


We founded Mosaic in 2014 with the dream of making multi-material 3D printing as easy and accessible as possible. At the time, software to design multi-material prints was almost non-existent. When CANVAS Beta went live last year, it was the first software created to enable a smooth multi-material workflow. After months of hard work, CANVAS is more stable than ever and bug reports are few and far between. However, for the next chapter of CANVAS, we need to introduce a couple of big changes.
Today, CANVAS moves out of beta with a makeover from head to toe. New features, a completely refreshed interface, and numerous improvements behind the scenes take the platform to an entirely new level. Read on to find out about the new features and what’s next for CANVAS.
Paint
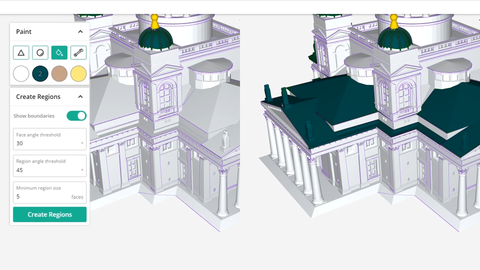
With today’s launch, users are able to digitally paint models in CANVAS. This makes it easier than ever to create multi-color designs.
Palette 2 made a significant step toward making multi-color printing accessible to a new community. However, designing parts was still a challenge. There are millions of 3D models available on the internet, but only a small percentage are split into multiple pieces for printing in multiple colors. Designing these models would typically be significantly harder than their single color counterparts. While the library of color models is growing, it’s still in the early days. This has put a damper on one of the unique value-adds of 3D printing - the ability to create unique and custom objects.
Digitally painting models has been a dream of the 3D printing community. For many years, our team and others in the industry have attempted to achieve this dream.
It took a specially designed slicer and many months of focused development, but we are thrilled to announce that CANVAS now has painting functionality!
Selecting a single STL in CANVAS brings up the new tools. These tools allow you to digitally paint color onto each of the triangles in your model. Similar to other design applications, there are brush tools and a fill bucket. Specific to CANVAS is the ability to analyze a model and create various different “regions”. These regions are based on unique geometries in your part and allow you to quickly specify colors using the fill tool.
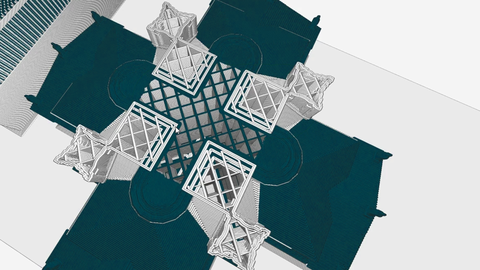
Once your masterpiece is complete, CANVAS uses the painted colors while it slices. Unlike other programs, CANVAS does not actually split the model into separate STLs. Instead, the color is applied on a layer-by-layer basis. This allows the creation of larger regions of each color inside the part, for better print quality and part strength. Since the paint data is being used directly by the slicing engine, it is not compatible with other slicers.
Get started with CANVAS paint by watching this tutorial or take a deep dive into all of the tools, tips and tricks in this longer video.
Here are a couple of examples of what we’ve been able to create by painting models in CANVAS:
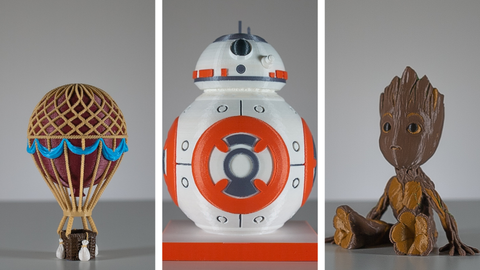
Painted in CANVAS, Printed with Palette
(The Skylift by Makerbot, BB8 by Rasse32123, Baby Groot by Byambaa)
Sharing
Now that you have the ability to create all these cool multi-color models, what if you want to share them with a friend or others in the 3D printing community? Launching alongside painting is a new feature: sharing. Sharing allows you to easily send your models, printer settings, and material settings to others.
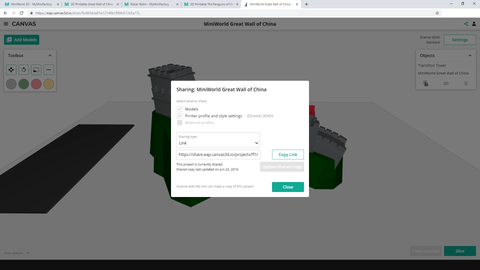
Sharing leverages the cloud architecture of CANVAS so that large models can be transferred easily, without the need to upload or download. Select a project or printer to share and CANVAS will generate a custom link. This link can be sent to a friend directly or posted on social media to give the community access. Don’t worry, anyone who clicks your link will only see what you chose to share. If they decide to import what you shared, it will create a copy in their account so any changes they make will not affect your projects.
If someone shares a project with you, you have control over what to import - the models, printer profiles and/or material profiles. If you’d prefer, you can also import only essential settings like support, infill and layer height.
For a more in-depth look at sharing, check out this video tutorial.
Want to try it out? We’ve pulled together a selection of models that were painted by the team at Mosaic, and created share links so you can import them into your account. Check them out here!
User Interface
One of the biggest changes that you will see when comparing the new version of CANVAS to the beta version is the updated interface. We’ve added more color and consistency throughout the application, making it more intuitive to navigate and use.
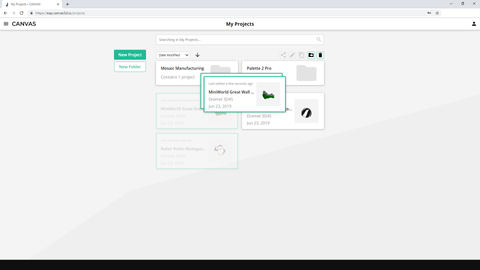
The side menu, accessible via the button in the top left, now gives you access to your printer profiles, material profiles, CANVAS hubs, and projects. The new printer manager allows you to edit, delete, and copy profiles. The projects view has also been completely reworked. Projects can now quickly be found, either by its image preview or by searching. It is now also easier to organize your work, with folders and a simple drag and drop interface.
You may also notice a major update to the print preview in CANVAS. Previews are now shown with thickness and shading. This makes it easier to know how the part will look before sending it to your printer.
Slicer Updates
As CANVAS moves out of beta, we have also added new settings to the slicer. One powerful addition is the ability to use variable layer heights. CANVAS will automatically choose the best layer height, in a specified range, for each layer of the print. This can help save print time and material but maintain print quality.
Rafts and supports are now more configurable, with additional settings for densities, extrusion width and layer height. New settings have also been introduced for placing perimeter seams. Explanations of all settings have been added when you hover over them.
For many settings, values can either be set as an absolute value or a percentage of a global value. Further to this, settings have the ability to be set automatically based on a calculation of other parameters.
Future Plans
A long-anticipated feature in CANVAS is the ability to decrease transition waste. Unfortunately, these transition improvements are not included in this update. Rest assured, these improvements are now the highest priority for the CANVAS team. In 2019, CANVAS will gain the ability to transition between colors in the infill of a part, print a selected model as some or all of the transition waste, and set variable transition amounts for each material. Expect these updates to be released on a rolling basis as they are complete.
Other planned functionality includes improved support generation with the ability to customize its placement. Paint will also be improved with tools to apply text or symbols to the outside of a part. In the future, we hope to support popular color 3D formats such as 3MF.
Today, CANVAS works only with Palette-enabled multi-material prints. However, multi-extruder support is planned for the future!
Pricing
If you are a Palette user, there’s good news: all of the functionality released today is free! That means you can get started with paint in CANVAS right away.
For users on other multi-material systems, this functionality will come at a small cost. Complete details will be announced later.
Tutorials
Learn how to use paint in CANVAS (Videos: Getting started or In-depth)
Learn how to share projects from CANVAS (Video)
A huge shout-out to all of our beta-testers! Thank you for test driving the application and helping us fix bugs.